Monday, April 27, 2009

Spicy Chickpeas


I love chickpeas and that love affair started long time ago during our stay in KL. II would wait patiently for one particular vendor on bicycle in the afternoons who came around our housing area with this steaming snack. He would scooped a cup of these into a cone cup he made with a piece of brown oiled paper and that could be exchanged with a mere 50 cent. The aroma and flavors from these goodies stayed with me for years. During a Yoko farm outing last year, Margaret came with a dish that brought such nostalgic feel I had to get the recipe from her. Like a kind soul that she is, she explained the entire process and I quickly scribbled on the back of a supermarket receipt (I kept all these bits and pieces solely for these purposes as I tend to forget easily).

Very few ingredients needed and measurements are not crucial. A handful of curry leaves, 1 tablespoon or so of mustard seeds and as many or as few dried chillies as you like for 500g of dried chickpeas.

To prepare the dried chickpeas:

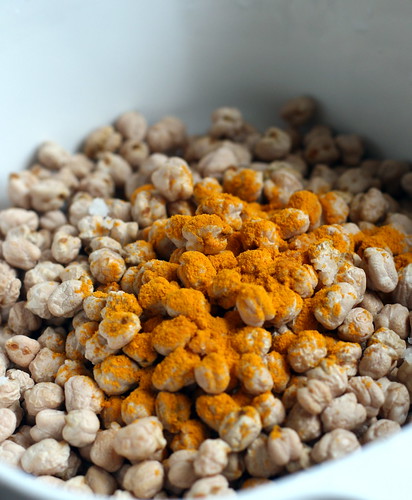
Rinse the legumes well in a colander off dirt and grit, pick out bad peas and small pebbles. Transfer into a bowl and add 1 teaspoon of turmeric (kunyit) powder and 1 teaspoon salt.

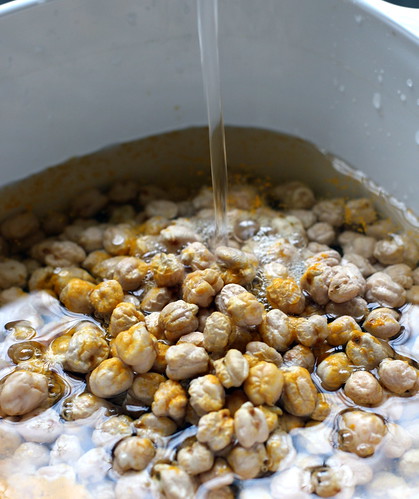
Cover with plenty of water and let soak for 6 hours or overnight.

Soak them, the legumes expand, boil them in the soaking water (I did mine in a pressure cooker for 10 minutes, cooking without pressure would take slow simmering for an hour or two) and they expand further. 
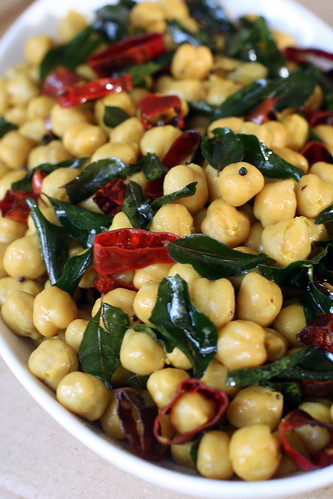
Spicy Chickpeas
500 g cooked chickpeas
3 - 5 dried chillies, wash, snip into thin rings with scissors and discard seeds 
1 T mustard seeds
1/2 cup curry leaves, roughly chopped
1/2 t turmeric powder
salt to taste
1 t chili powder, optional 
2 T oil

Heat wok and 2 T oil, fry dried chili on medium heat until fragrant (do not burn as they will taste bitter). Drain and put aside.
Fry the curry leaves until fragrant, drain and keep aside.
Fry mustard until fragrant and drain. 
Leave 1/2 tablespoon of the oil in wok, add the turmeric powder and chili powder (if use). Return all the fried ingredients and peas into the wok and mix well. Season to taste.
Serve as side dish or munch on during American Idol.


Saturday, April 18, 2009

Guinness Stout Chicken

Hub handed me a cut-out (he does that very often) from our Star newspaper food column featuring Amy Beh dated 24 March. He said, "Try this", pointing to a chicken dish. "It sounds interesting". The only thing I found interesting was of course the stout. Never cooked with (nor drank) stout before but the overall ingredients sound promising and simple steps to follow, so I gave it a try. 

The only reservation I had was the marinade as it contained sugar and this dish calls for deep frying the chicken after marinating. See all the burnt sugar at the side of wok?

Anyway, the chicken after frying tasted so good (the nam yee gave the meat such a lovely fragrant) I almost didn't continue with the rest of the recipe. I would have left it at that if I hadn't gotten the stout specifically for this dish. Oh, now I know what I should have done...ate the chicken together with a bottle of chilled stout!!
The dish turned out very well as the stout gave the end gravy a velvety texture with a slight bitterness which was hardly noticeable (to the girls) and no taste of the beverage at all.

Here is the adapted recipe with slight changes.

Guinness Stout Chicken
1 chicken or 4 thighs and drumsticks, chopped 

Seasoning (A)
2 T (tablespoon/s) light soy sauce
1 T sugar
2 pieces red fermented beancurd (nam yee)
1 T water
2 T cornflour

Sauce (B)
2 T oyster sauce
1 can Guinness Stout
50 g rock sugar
1/2 t (teaspoon/s) thick soy sauce
100 ml chicken stock (or dissolve 1/2 cube of stock cube in 100 ml water)

Marinate chicken with (A) for few hours (I left mine overnight).
Deep fry chicken pieces in hot oil until golden. Drain.
Heat up another pan (as the wok frying the meat would have all the burnt caramel stuck all over), put a tablespoon of oil from the wok into the pan. 
Add (B) and bring to boil.
Add the fried chicken and simmer until the gravy thickens.
Serve with a plain boiled leafy vegetable and steaming rice. Yumzzz.

Thursday, April 9, 2009

Radish Kimchi

Radish Kimchi

Daniel gave us this bottle of cincalok he made himself and the 'scent' that wisps out is oooh soooo potent. Must get the recipe from him. Whenever we open the lid, never failed, all the flies from the neighborhood come zooming in. 
What is the first thing that come to mind when that familiar aroma hits the nasal sensory? KIMCHI!! This is perfect for kimchi making. 

I was flipping through this new edition of Flavours on board the flight from KL to KK recently and it was featuring none other than Korean cuisine! Needless to say, found many kimchi recipes staring at me. These kimchi recipes looked so intriguing as they call for apple and pear alongside the usual pickling ingredients. I decided to go with the radish kimchi according to the recipe in the magazine and found this a true keeper. The fruits imparted a slight hint of refreshing sweetness to the otherwise intense dish. The kimchi turned out perfect in every way - crunchy, spicy, pungency and all things kimchi.
Here is the recipe...

Radish Kimchi
2 kg radish, peeled, diced into 2cm cubes
2 T coarse sea salt

Kimchi  pickling paste
100g chilli flakes
10 fresh chillies*, seeded and diced
1 brown onion, peeled and diced
1 pear, peeled, cored and diced
1 apple, peeled, cored and diced
3 T cooked rice
50 g ginger, peeled and sliced
1 bulb garlic*
3 T fish sauce
2 T cincalok or Korean brined baby shrimps
sugar and salt to taste
* Optional. The recipe for this radish kimchi has no garlic, I added them because we love the garlicky taste.  

1. Marinate radish with the 2 tablespoon of salt for at least 2 hours. Rinse salt off radish thoroughly and drain well.
2. Blitz chilli flakes, fresh chillies, onion, pear, apple, rice and ginger to a fine paste. Add the fish sauce, cincalok, sugar and salt. Mix well.
3. Mix the paste into the radish well and store in clean glass bottles. 
4. Leave to ferment for a day and it is ready to serve. Can be kept in fridge for weeks (if they get to last that long). 

Monday, April 6, 2009

Zesty Pork Tenderloin

This recipe is from channel 703. Although we seldom use oranges for cooking except as salad dressing, this dish looked so good I decided to give it a try. The dish above looked no way near the finished dish I saw on TV but nevertheless, it did taste very good with a citrus aroma from the zest and a tangy flavour from the juice. Give it a try. It is very easy to do and a nice change from the usual soy sauce, oyster sauce and more soy and oyster sauce.

Zesty Pork Tenderloin
300 g pork tenderloin, sliced into 1/2 cm thickness
2 - 3 dried chillies, washed and diced
1 inch ginger, sliced thinly
2 - 4 cloves garlic, peeled
1 chili, seeded and diced
1 carrot - optional, peeled, sliced thinly and parboiled 

Sauce
1 orange, zest and juiced
1 T black vinegar
1 T soy sauce
1 t sugar
salt 

Marinade
1 t sesame oil
1 t cornstarch
1 egg white
salt and pepper

oil for deep frying

1. Marinate pork slices with salt, pepper, egg white and cornstarch. Add a tablespoon of water if the marinade is too thick. Leave for 10 - 20 minutes.
2. Heat oil in pan, deep fry the pork, drain and keep aside.
3.  Leave 1 or 2 tablespoons of oil in the same pan, fry the dried chillies until fragrant, add the ginger and garlic, again, fry till fragrant.
4. Add the black vinegar and soy sauce, bring to boil.
5. Return meat to the pan, add the carrots (if using), some diced chili and the orange juice with zest. Cook until sauce thickens. Season with sugar and salt to taste.
6. Dish out, garnish with orange slices and chili. Serve with rice.